


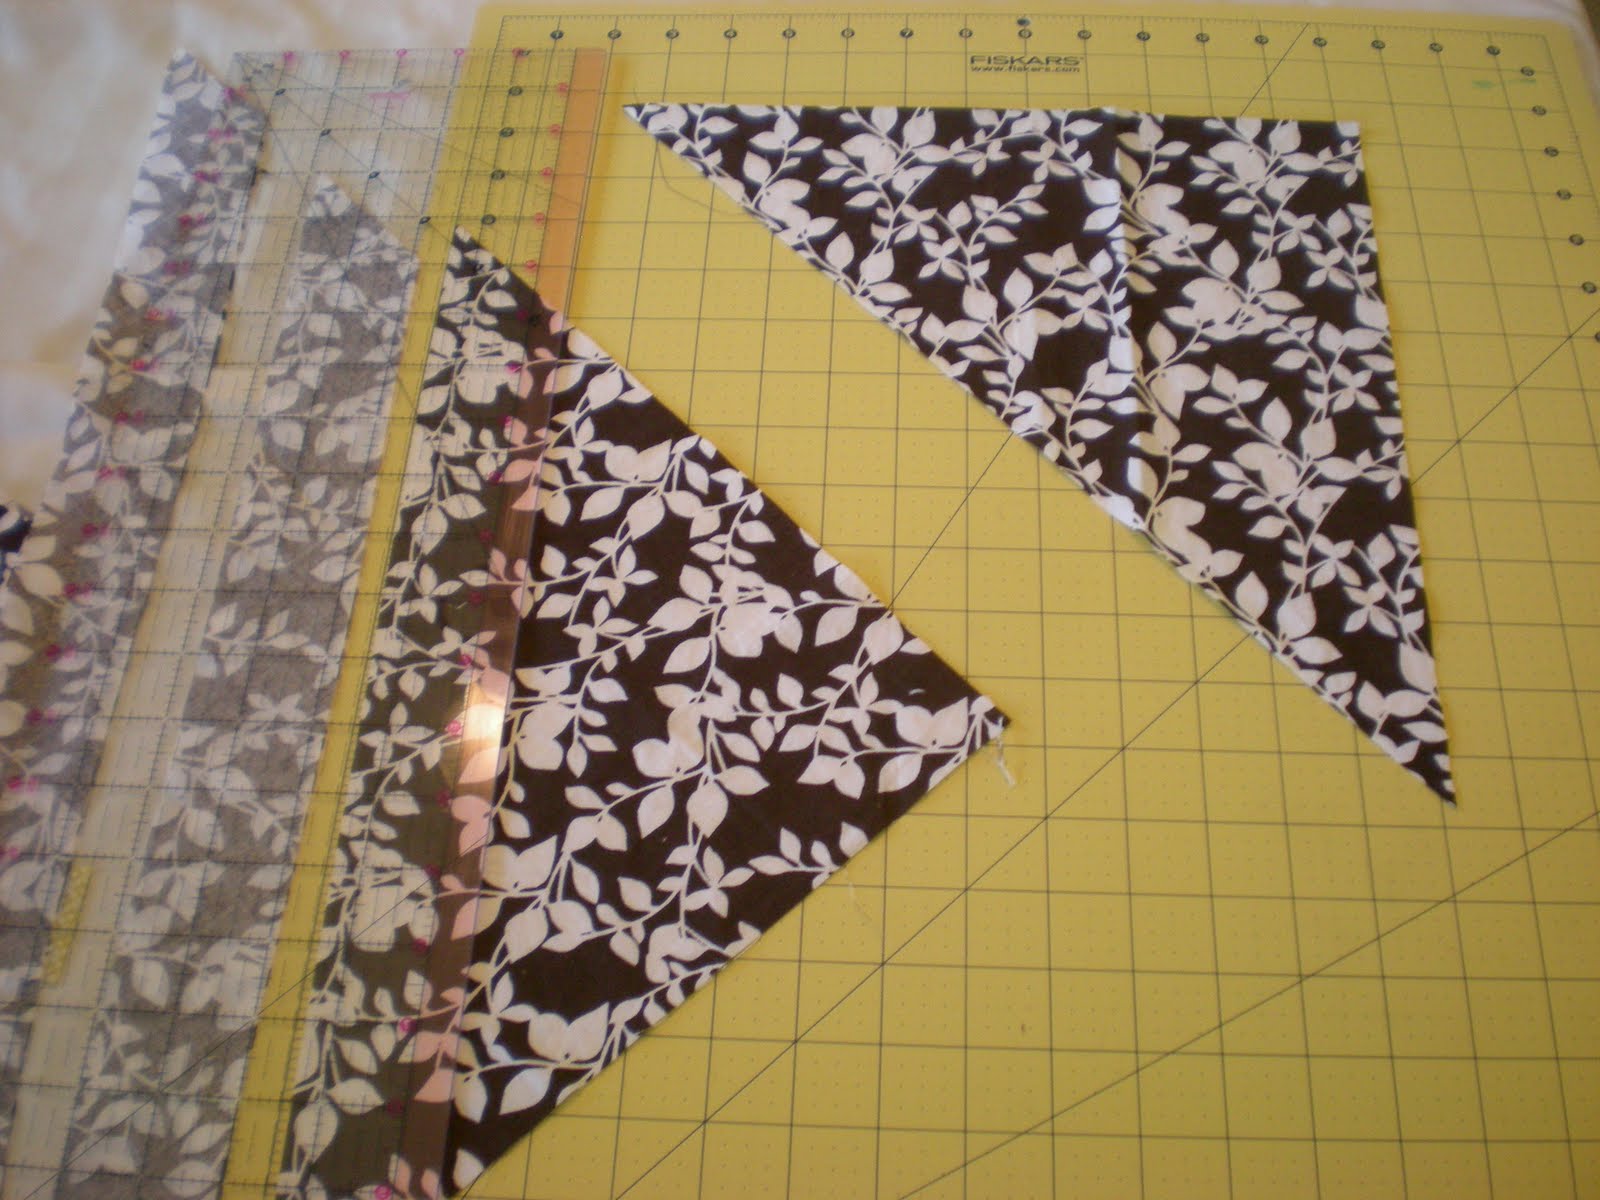
You now have two triangles. Place one triangle on top of the other and match up the longer sides together. Use the straight edge of the longer side of the triangle as a guide and cut a 2"strip, then another 2" strip. I cut twice, then before I cut the third strip, I removed one of the triangles to use as the headscarf and then I cut the remaining triangle a few more times.

For your triangle piece, fold both of the shorter sides 1/4", then another 1/4" towards the wrong side of fabric. Leave the longer side as is. Edge stitch both of the folds on the triangle about 1/4" in, backstitch when beginning and ending. Cut off the excess fabric at the end of both sides.


To make your bias tape you will probably need to sew two or more pieces together to make a longer bias tape. To sew two pieces together, place one piece on top of another, perpendicular, and right sides of fabric together. It is easier if you cut off the angles at the ends to square up the fabric. Sew a stitch across diagonally, backstitch when beginning and ending. Cut off the excess fabric. If you want a longer piece, repeat these directions to add on another piece. Cut to desired length. I used a 24" piece for my 15 month old. You will probably want to measure your child's head to see how long you want to make it, leaving extra fabric to tie in the back as well.


My beautiful daughter decided to decorate my mat with pen

Fold the triangle in half and the bias tape to find their center points. Match those up and pin the bias tape onto the raw side of the triangle, making sure the bias tape is on both sides of the triangle.


Start from one side of the bias tape and sew an edge stitch about 1/2" in or as close to the edge as possible. Make sure you are catching both sides and backstitch when beginning and ending. You are done! For more free tutorials, visit my blog at http://www.pinkpoodlebows.blogspot.com


Oh, little projects like these make me wish I could be more crafty! I'm just not great with a sewing machine! This is so cute!
ReplyDeleteI'm stopping by from this week's Super Stalker Sunday hop! Thanks for participating! I hope you'll join us again next week and I hope you'll stop by and visit me if you haven't already!
Mariah, Formula Mom
Super cute! And you explain it really well. I might even attempt it :)
ReplyDeleteStopping by from the Super Stalker Sunday blog hop, following via GFC. Look forward to reading more!
Blessings,
Melissa
http://sistersncloth.com/
I love all your patterns, very cute dresses! New follower from super stalker hop, have a great day!
ReplyDeletehttp://wvfrugal-wvsaver.blogspot.com/
hi, new follower from super stalker sunday hop. would love for you to visit my blog and follow back if you like.
ReplyDeleteCute project! I love her little dress!
ReplyDeleteJamie @ Mama.Mommy.Mom.
www.mamamommymom.com
www.facebook.com/mamamommymom
www.twitter.com/mamamommymom