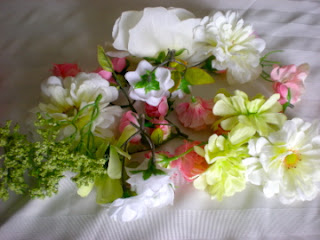
Next week I have the pleasure of helping with a shower and I was in charge of making some table decorations. I decided that I wanted the center table to have something other than a vase with fresh flowers, so I decided that I was going to attempt to make some decorative balls to go inside this large 18" glass cylinder vase. I went to my local craft store and picked up some styrofoam balls in some different sizes, some spanish moss, and a wood letter "R" since that will be her new last name. I already had some scrap ribbon, fabric and flowers that I was planning on using as well.
Here is my mess of supplies! The little hands that will appear throughout this post is my three year old "A". She is my special helper today while her sissy "R" is taking a nap.
To make my flower ball, I just gathered some flowers and removed them from the stems. I added dabs of glue to the base and stuck the flower into the styrofoam ball.
To finish the flower ball, I added some leaves to it. I had to place the glue onto the back of the leaves and just attach them to the ball that way because they did not have a sturdy enough "stem" to stick into the styrofoam ball.
To make my "moss" balls, I pulled out enough spanish moss to wrap around the ball. In hindsight, I should have bought the green balls but I wasn't sure which ones I was going to wrap in moss, so I bought all white.
I placed a good amount of glue on the top part of the ball and placed the glued end onto the center of the moss. Then, I placed more glue onto the top of the ball and wrapped the moss around it so that it would cover it all.
The first one was showing too much white through from the styrofoam ball, so I had to add a little more moss to it. And it made a huge mess!
So...I was a lot smarter with the next two I made and put a good amount of moss into a plastic bag and repeated the steps of adding the moss to the styrofoam ball...and it worked out perfectly! You can just mash the moss and it will hold in place around the ball, or cut off any stray parts that you don't want.
To finish my centerpiece I cut my fabric scraps into 2"x10" strips and placed them in the order I wanted them. I placed the first two pieces, right sides together, and sewed one side using about a 1/4" seam allowance, then I repeated that step to add all my scraps together into one line. I used about 8 pieces total.
I then ruffled my fabric by setting my machine to a baste stitch and doing a straight stitch directly down the center. Then I tied off one ends strings together, and on the opposite end, I pulled the bottom bobbin thread to ruffle the large strip. Then I tied off that end. ("A" was having fun holding the fabric for me...which resulted in some crooked parts...but it's going to be ruffled so no one will notice!)
When I was done, I made a spiral on my vase using double stick tape and stuck my ruffle onto it. I painted the "R" and hung it with some string onto the vase. And that was it! A cute centerpiece in under an hour.


Hey girl! That is such a cute creation. Talented!
ReplyDeleteI see we are on the same blog hop. Have fun at Disney Land!
I am following you via the Memorial Day Finding New Friends Weekend blog Hop. Please stop by my blog and say hello. You know I am already following you on GFC.
http://itsabouttimemamaw.blogspot.com