

There are other ways to add layers to your bow, this is how I do it because I'm too lazy to sew them together! You will first need to make your "figure 8" bows. Refer to the tutorial on how to make a figure 8 bow on how to do this, then come back to this tutorial.
To add your layers to your bow, you first need to think about what you would like it to look like. You want to have coordinating colors, different sizes of ribbon and prints to add interest, and you can even add tulle or marabou and/or feathers. The combinations are endless! For this tutorial, I am going to make this blue bow, with two coordinating ribbons, blue marabou, and a large rhinestone. I will be attaching it to a stretchy headband as well.

1. Make your two different size figure 8 bows. I used a 1 1/2" blue ribbon as the base of the bow, and the zebra print as the top layer on the bow.

2. To add the "x" or fishtails to the back, I placed it onto the larger blue bow to see what length I wanted them to be, then I cut two pieces.
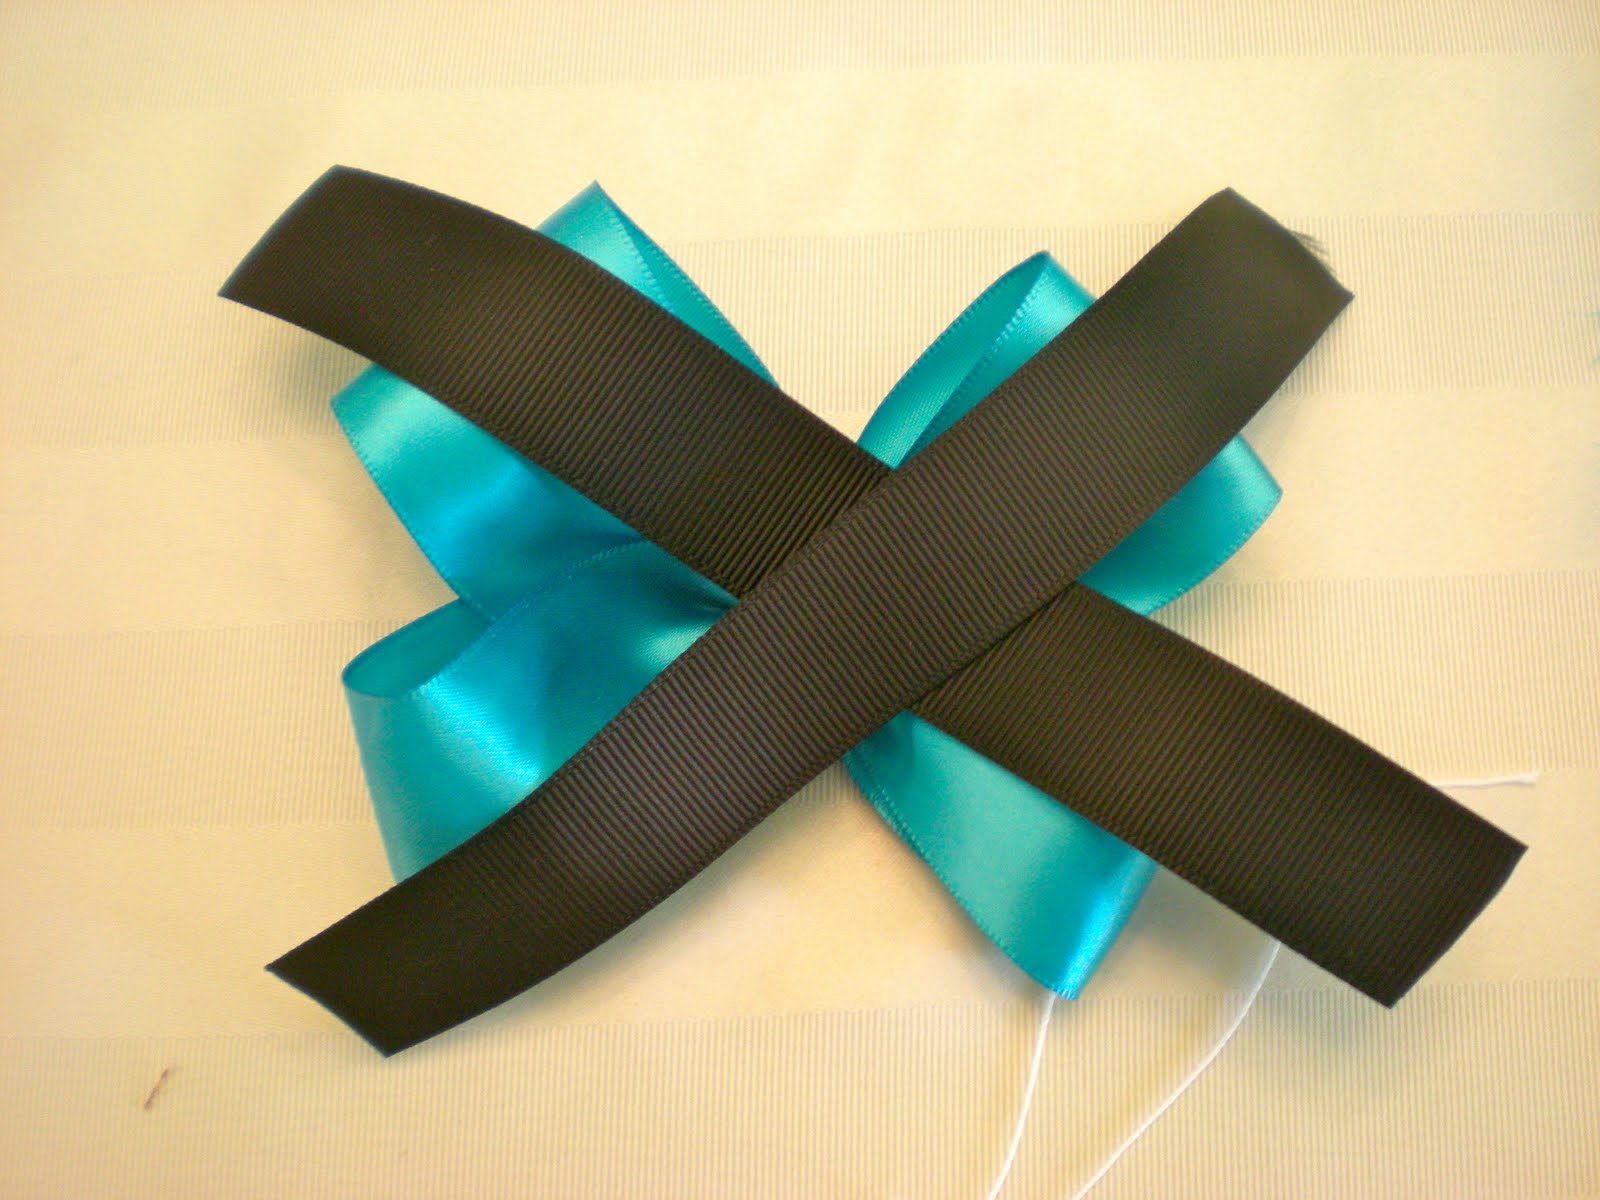
3. Place your control clip onto the center of the bow and tie the two pieces of ribbon onto the bow, going through the center of the control clip. Knot well, but don't pull so tight that you break your sting.


4. Take the ends of the ribbon and fold them in half. Cut an angle into them from the fold to the open ends. The open ends should be longer. Open the ends slightly apart from each other and sear the ends of the ribbon with a lighter. Repeat for the other ends. Cut off your string.


5. If you want to add another layer, it can be more ribbon, or marabou as I am adding, just place it onto the center of your bow. NOTE: When working with marabou it is messy! Feathers fly everywhere! So I cut my piece inside a plastic bag, then pull off any loose feathers first, then place it on my bow. Add it by using your control clip and tying a new string around it. Cut off your loose string.


6. After tying on this piece, add your last bow to the center and repeat with tying it to the center as well using your control clip.
Don't cut off your loose string.

7. Pick a spot to tie it to the headband. I like to pick the part where there is the seam of the headband because I want to cover that up. If you want to just add a clip, refer back to my tutorial on how to make a basic bow.


8. Cut about 5-6" of a piece of ribbon to be your center and you can leave it as is or knot the center. Dab a bit of glue onto the center of the bow and add your center of your ribbon onto it. Dab a bit of glue onto the back of the headband, wrap the end of the ribbon around onto it, slightly pulling it to make it a little tighter. Cut off the extra ribbon. Wrap the other end around and repeat dabbing the glue, placing the ribbon onto it and slightly pull it to make it tighter. Cut off the excess ribbon and slightly touch and go with a lighter to sear the end. Do not leave your lighter onto it for too long or it may catch on fire.


9. Add a large rhinestone, button, or leave as is! Now you have a fancy looking bow and who knew it could be so easy!


You can even add layers to a basic bow, or mix up different styles of bows!


No comments:
Post a Comment
Comments are always welcome, thank you!