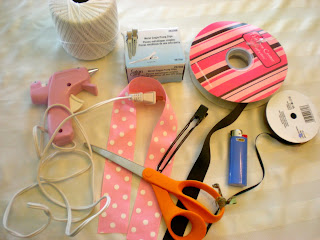
What you will need:
You will need: a glue gun, glue sticks, alligator clips (metal single prong clips), a control clip, scissors, a lighter, string, and about 20"inches of 1 1/2"ribbon (seen here in pink), about 5"inches of 5/8" ribbon (black), and 1/8" ribbon (thin black ribbon)
1. You will have to refer back to the first tutorial on how to make a basic bow to make your bow first. Move the "x" of the tails a little higher up though so that the tails will be a little longer on this bow.
control clips come in handy to hold your ribbon in place
2. Refer back to the basic bow on how to add your center and alligator clip to the back of your bow. Do not finish the tails with an angle or fishtail, we will be adding the ballerina shoes to the bottom
3. Place the tails of the bow together to make sure they are even, if they are not, just cut off the excess ribbon.
5. Let's make those ballerina shoes! First cut the black 5/8" ribbon the same width as the tails.
6. Place your 1/8" black ribbon on the tail in an "x" and see the length that you want. I usually cut a little extra just in case. It ends up being about 3". Cut out 3 more 1/8" ribbon the same length. (Note: you want the "shoe" (5/8" ribbon) on as you do this because you want to see where the placement of the "laces" will be with all the pieces on because the "shoe" will have to be glued on later as well.)
7. Keep the "x" in place and mark with a pen underneath it where you want to place the "x" when you glue it on.
8. Place a little bit of glue down the back of the ribbon and place it on your marks. Once you have both pieces glued on to make your "x" (laces), you can glue the "shoe" 5/8" ribbon onto the bottom. Place the 5/8" ribbon a little over the laces so that they appear as though they are under the shoe part.
9. Fold the tail in half lengthwise and you will need to round the "shoe" part at the bottom by cutting on the open end. Once you have cut this, use your lighter to lightly sear the edges of you shoe and sides of the exposed "laces" (1/8" ribbon). Repeat all steps for the other tail of the bow and you are done!
10. (Option) you can try this on a smaller bow as well. If you like the shoe rounded at the top, just fold the ribbon that you want to use in half and round the top first, slightly searing that curve, then follow all the same steps to make the ballerina shoe.
.


No comments:
Post a Comment
Comments are always welcome, thank you!